Adventures with Snap
And here comes another package format :) .
So as I was just getting used to docker and building debian/ubuntu packages (.deb), there is now a new format trying to become standard. This is snap packages. I know, I know...there is also flatpacks, but while I have investigated, seems like a bit higher barrier to entry than what snaps offer up front.
While I won't go through the entire process of building and setting things up, I just wanted to hit on a couple points I learned recently. For a full break down, feel free to head over to snapcraft.io to get all the details. The gist of things is that with a simple yaml file, you can create a snap package to distribute your code. For example, here is what I used for packaging up my bluetooth utility Bjarkan:
name: bjarkan
architectures: [amd64]
version: '1.2.0'
summary: Command line bluetooth utility
description: |
  A command line bluetooth utility that allows you to completely manage all
  things bluetooth. Scanning, pairing, listing of devices.

grade: stable # must be 'stable' to release into candidate/stable channels
confinement: strict # use 'strict' once you have the right plugs and slots

apps:
  bjarkan:
    command: env GI_TYPELIB_PATH=$SNAP/usr/lib/girepository-1.0:$SNAP/usr/lib/x86_64-linux-gnu/girepository-1.0 bjarkan

parts:
  bjarkan:
    plugin: python
    stage-packages:
      - gir1.2-gtk-3.0
      - python3-dbus
      - python3-gi
The point and learning curve I wanted to cover here is the confinement section to the yaml file and the comment that comes along with the file after you initialize the directory, I believe, doesn't help with things. The issue is when to use strict versus other options. When you are developing and testing your snap locally, you are recoomended to use confinement: devmode. Then just like the comment in the file states, you are recommeneded to use strict once you are ready to release. The big difference here is access and interaction with the rest of the operating system. This became really apparent when I went to snap up a package that I came across via reddit (exa).
So the problem here is that exa sole purpose is to be a simple replacement for ls which inherently interacts with the file system to give the user some feedback and details about their files. Well with a strict confinement, this completely falls apart. You are presented with OS and permission denied errors.
[wdeberry-linux ~]$ /snap/bin/exa /
/: Permission denied (os error 13)
This is because what is in a snap package, literally cannot interact with anything outside of it's own installation directory. However, there is an answer! Since snapd version 2.20, Canonical has introduced classic confinement. This allows you to still build a completely bundled and isolated package for installation purposes, but be able to interact with the rest of the system.
Such a simple change but something that can have huge impact on how you design your snap package going forward.
Note
I just have to take moment and highly recommend integration with https://snapcraft.io/. This simple service allows you to tie changes pushed to your project on github. Thus creating a new snap package ready for deployment within the snap store all for free :).
Move all the things to Docker
So what happens when you have a local esxi server and you realize that your resource usage is higher than what you are actually using....you blow it all away and migrate to docker! :)
My setup consisted of 3 VMs total. A VM for a web server (nginx), a database VM which was both mysql and mongodb, and lastly, a DNS server (bind) that also doubled as a salt server. Obviously, the first thing done is back up all your files. In my case this involved nginx configurations, dns server configurations and a couple of databases I had running. I have also backed up my salt configurations but being that I am down sizing on the amount of servers to manage, not sure yet that salt actually fits or is even needed with the new setup.
So outside of having to learn docker and docker-compose in general, there were 2 hurdles that really dragged this process out beyond a couple of hours to a couple of days. The first hurdle I ran into was getting letsencrpyt working properly. Because who wants to run a web server on http anymore, especially when a fully qualified cert is free and super easy to get. The second hurdle was getting nextcloud installed using their fpm image.
The first hurdle was definitely the least worries of the two, but was definitely frustrating since I hit this wall 10 minutes into the transition. For letsencrpyt, I mainly used this guide, and their source code to piece things together. The thing that killed me was copying and pasting was line 18 from their docker-compose.yml file. --standalone-supported-challenges http-01 is a depracated option to the certbot command now. So when I saw this, I ended up removing that argument alltogether rather than understanding what it was trying to accomplish. This led me down a 2 hour whole of trying to figure out why letsencrypt was trying to use port 443 for generating a cert when 443 wasn't listening yet in the webserver, since I didn't have a cert. The answer, once I read the man pages, was to use --preferred-challenges http. This forced things to be done over port 80 and generated the certs properly.
Hurdle number two strictly involved with deploying nextcloud via docker using nginx as a frontend proxy. I used both upstream docker images provided by the nginx and nextcloud teams respectively. Nextcloud however, I decided to use their fpm based image rather than their default. This was strictly decided because I felt like it would have been overkill to still a docker image with the apache webserver behind a webserver already being provided by nginx.
Anyways, nextcloud's docker image expects the volume for the nextcloud files to be mounted within the image at /var/www/html. So I accomidated this and mounted a local nextcloud directory to where they wanted it.
nextcloud:
    image: nextcloud:fpm
    container_name: nextcloud
    ports:
        - '9000'
    links:
        - mysql
        - redis
    volumes:
        - ./www/html:/var/www/html
        - ../storage:/mnt
        - /etc/localtime:/etc/localtime:ro
    depends_on:
        - mysql
    restart: always
However, since I tend to have everything in the www directory for nginx organized per project, I mapped this to my nginx docker image to /var/www/nextcloud, as seen in my nginx example below:
nginx:
    build: ./nginx
    container_name: nginx
    ports:
        - '80:80'
        - '443:443'
    volumes:
        - ./www:/var/www
        - ../storage:/mnt
        - /etc/localtime:/etc/localtime:ro
    links:
        - letsencrypt
        - nextcloud
        - collabora
        - transmission
    volumes_from:
        - letsencrypt
    depends_on:
        - letsencrypt
        - nextcloud
        - transmission
    restart: always
Well this is where things started going downhill and eventually took me a couple days till I found something online that pointed me in the right direction. Long story short, if you are going to run a webserver and a separate fpm docker images, you have to have all URL paths be exactly the same. Both docker containers need to be able to look things up the same way, even as strict as file pathing. To solve this, I renamed my nextcloud directory that was in the www to html. This made my nginx container match the nextcloud container paths and solved all 404 errors I had been getting. Hopefully this saves someone or my future self some hours going forward knowing this.
Outside of those hurdles I had to deal with, docker has been fun to learn and understand all the black magic that goes along with it. For those interested, you can find the latest state of my docker-compose file on my github.
From macOS to Linux
So I finally got tired of not having a linux desktop environment to play around with that I had to take the next step. Granted, I do have full Ubuntu servers up and running, but this isn't good enough when you want to distro hop and test new software such as libinput or HiDPI. So like I said, this finally got me to take the plunge. I had to figure out how to dual boot linux on my 2015 mbp 11,5 without destroying any of the macOS data.
| Step 1: | Resize the macOS partition |
|---|
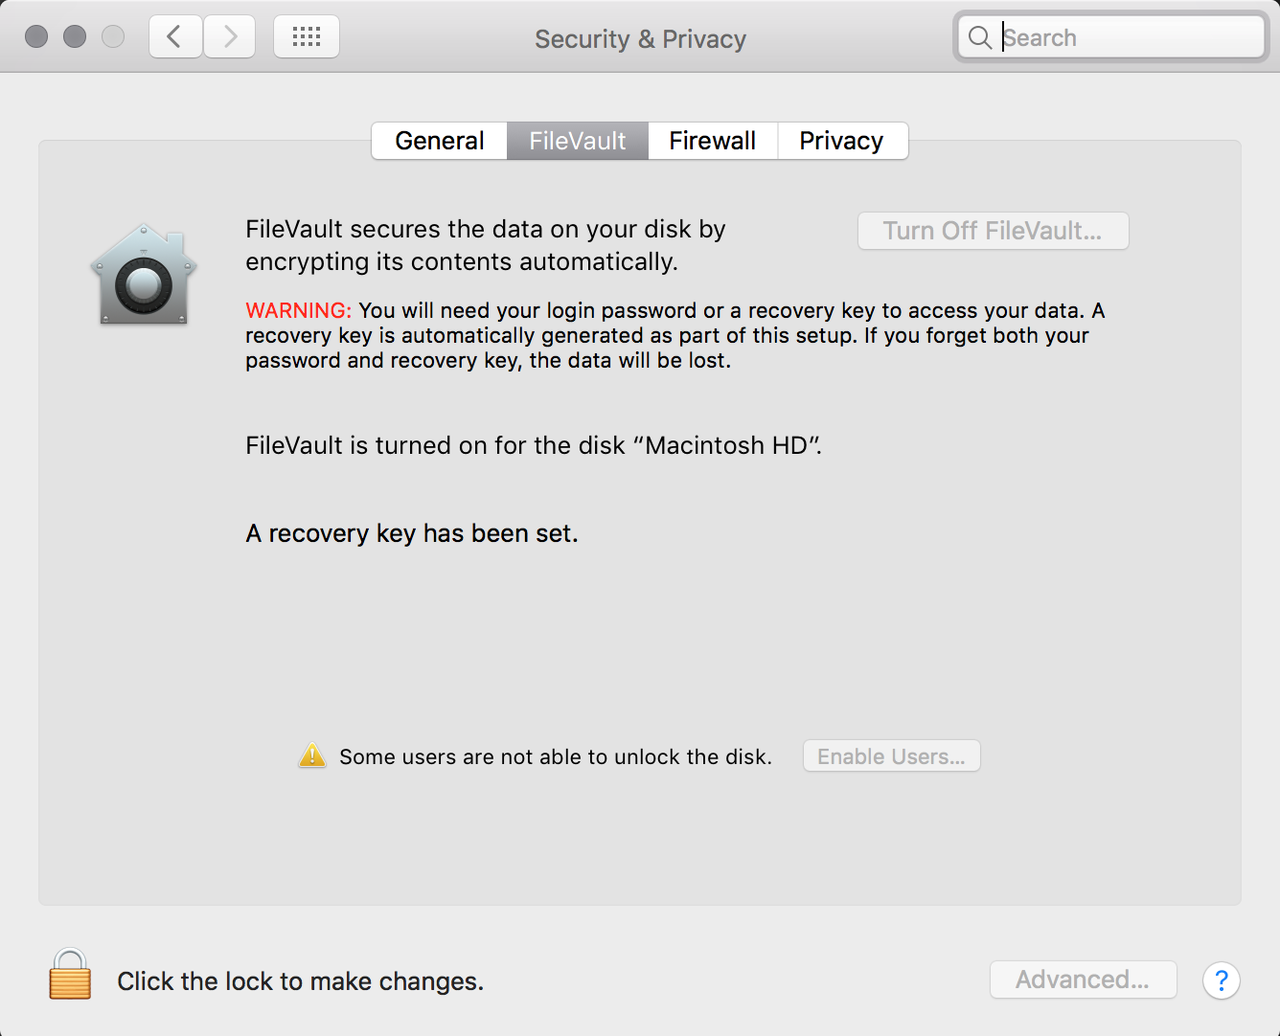
Verify that FileVault is turned off. If not, you will need to disable before you are allowed to resize the macOS partition. Once off, reboot to apply.
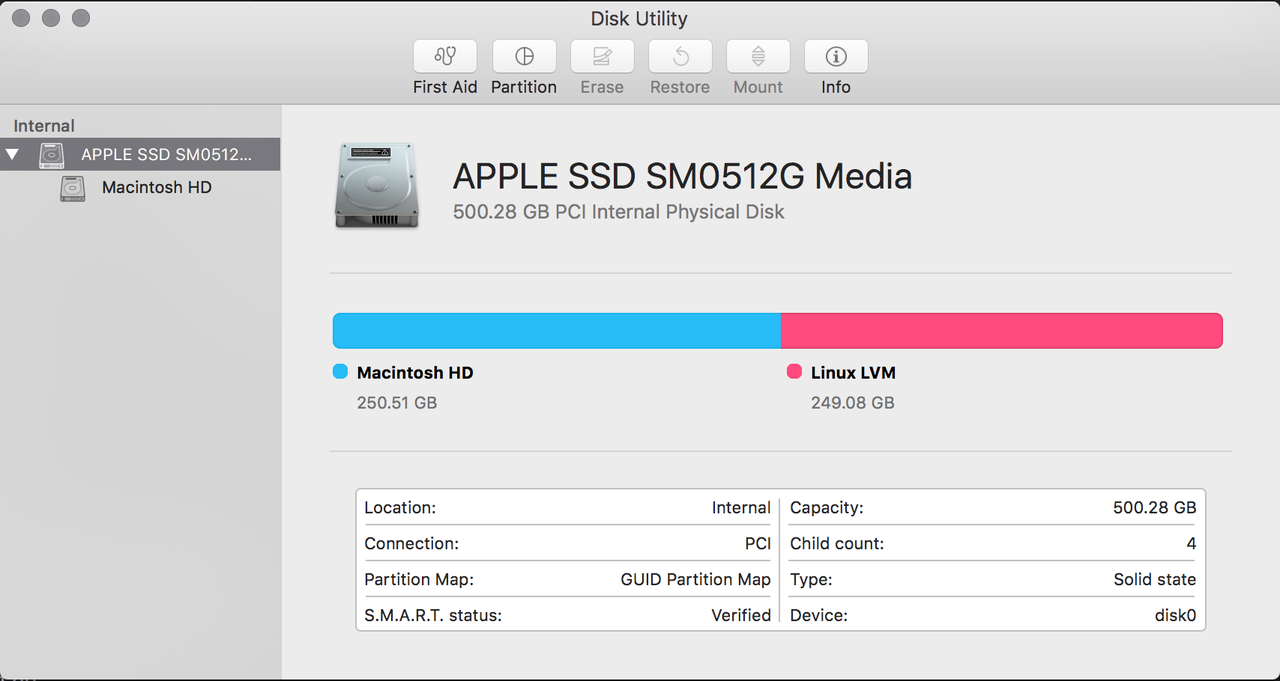
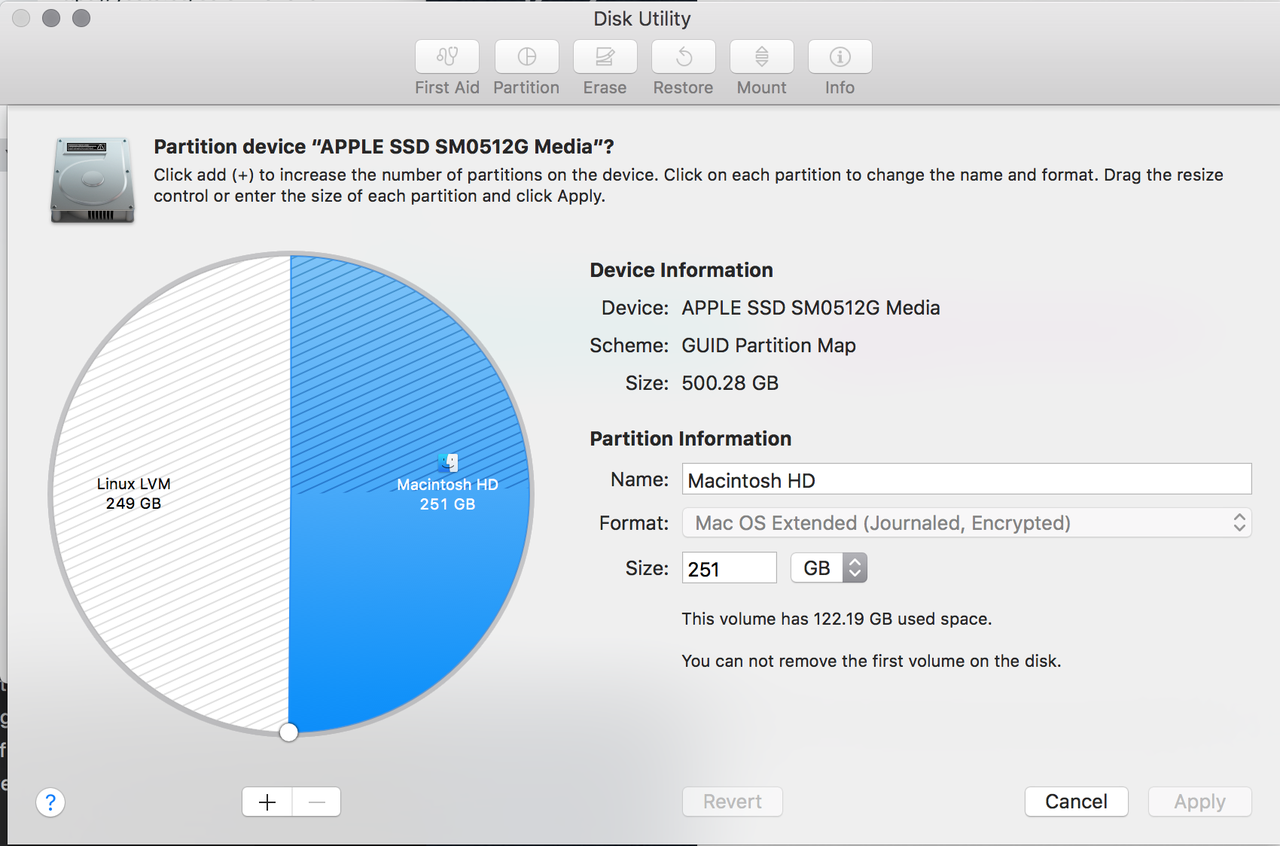
Onec back up and running, launch disk-utility. On the left hand side select the macOS hard drive and choose First Aid. This should present you with a pie chart on which there is a dial you can drag to split up space between partitions. Choose your desired split and then apply.
When resizing is complete, feel free to turn FileVault back on. The rest of the process isn't affected by it.
| Step 2: | Download desired Linux distro |
|---|
In my case, I wanted Arch but didn't want to go through with the hassel of dealing with manually setting up and installing vanilla Arch, so I chose Antergos. At this point, just take the iso you download from your specific distro and create a bootable usb stick to install. In order to acheive this, I just used the dd command. sudo dd bs=4096000 if=/Users/wdeberry/Downloads/antergos-17.6-x86_64.iso of=/dev/disk2; just make sure to update for your iso and disk use case.
| Step 3: | Boot and install |
|---|
Using the newly crafted usb stick, reboot your macOS and then hold the left alt/option button during next boot. You should see a second boot option next to macOS. Choose this and follow the instructions for your chosen distro to install. I won't use this time to go through specifics to get linux installed.
| Step 4: | Time to customize and have fun :) |
|---|
All major features are working out of the box for me, but I mainly had to fight the HiDPI support and touchpad configuration to get things working the way I wanted.
The issues with HiDPI I ran into were things like the mouse and the top title bar of gnome being extremely huge. TO fix this, after a couple days of fighting with it via gnome tweak tool, I found the command gsettings set org.gnome.desktop.interface scaling-factor 1. This is the one command that finally put all UI elements to the same size. Feel free to change 1 to whatever scale you are wanting. Also, if you are looking for fractional scaling, you will need to combine gnome scaling and X11 zooming in order to achieve this.
For the touchpad to work more inline to what I have become used to in macOS, I had to adjust some config for libinput. Below is what I ended up using:
Section "InputClass"
    Identifier "libinput touchpad catchall"
    MatchIsTouchpad "on"
    MatchDevicePath "/dev/input/event*"
    Driver "libinput"
    Option "NaturalScrolling" "true"
EndSection
Give it one more reboot or logout and back in to get everything back in sync and the rest is history. For more information about tweaking and fine tuning, definitely look towards the arch wiki for mbp.
Battles with Nikola Themes
So after spending all day, I finally got my blog themed the way I wanted.
The goal was to get the blog running using the Zen theme. However this for one reason or another was not as straight forward as I intended it to be. Maybe this was due to my ignorance with Nikola or just reading too much into things.
The process started by reading the WARNINGS on the Zen site about the need for the less plugin. At this point I installed the less plugin via nikola plugin -i less. I believe this was the start of the errors I faced. From this point on, every time I tried and build my blog, I got the following errors:
Scanning posts......done!
ERROR: Two different tasks can't have a common target.'output/assets/css/main.css' is a target for copy_assets:output/assets/css/main.css and build _less:output/assets/css/main.css.
So I reached out to the all knowing Google and was led around in circles and basically found nothing that could help me actually build with the theme I wanted. Frustration and giving up started to creep in. So I went back to the WARNINGS that led me down this path in the beginning.
WARNING: The zen themes are LESS-powered (not less... because it is more-powered ;-)) If you use webassests (USE_BUNDLES = True in your conf.py), the theme will use compiled css files, so don't worry at all... But, if you want to build the css files from the zen LESS files, you have to use USE_BUNDLES = False, and have installed the lessc (official LESS compiler). Additionaly, you have a LESS plugin available in the Nikola plugins repo to automatically build the LESS files inside nikola build command. You can easily install it just doing: nikola plugin -i less.
I then dug through conf.py and realized that USE_BUNDLES is set to True by default. This finally caused a light bulb to go off and thus I attempted to run things without less. So I uninstalled the less plugin nikola plugin -r less. This was finally the tipping point and got things working for me. All is good now but that was definitely a frustrating battle I was not ready for.
TL;DR: If you are getting this error when building, remove the less plugin and continue on. I dealt with this for about 2-3 hours and thus wanted to provide a heads up to other fellow bloggers.
A Crazy Attempt at KDE Plasma on macOS
So I started an adventure to see what it would take and see if even possible to get some kind of linux desktop environment running successfully on macOS. Let it be known while this was fun, this definitely did not work nor was practical.
The first step was to download and get docker setup on my mac. This all started because I heard about a simple program called kitematic on a linux podcast last week. Kitematic is a simple GUI wrapper around docker hub and docker in general and allows you to manage things without being intimidated. You can download this great tool via https://kitematic.com/.
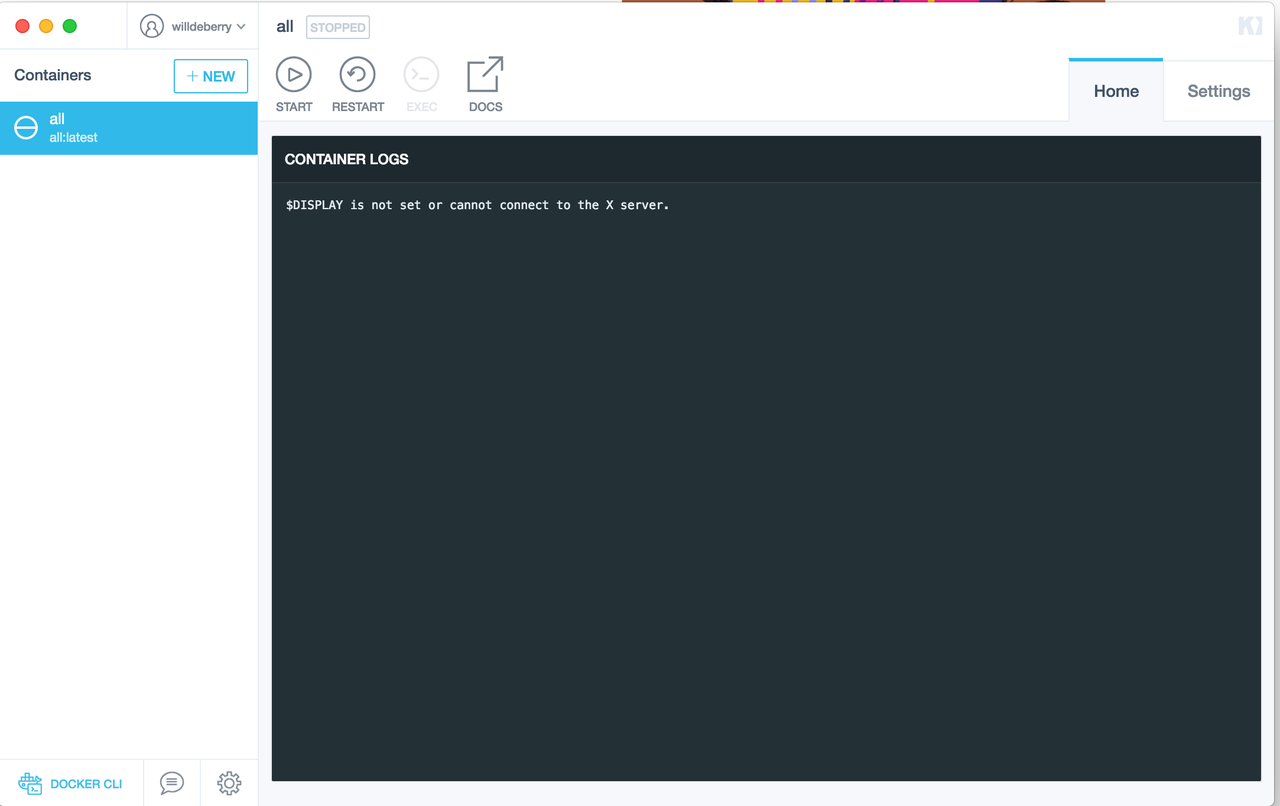
Once you have that installed, I downloaded the kdeneon sponsored all image. This quickly led to the snowball that would eventually takeover this side project. I found out real quick that it was having a hard time finding the DISPLAY variable
This was resolved via installing xquartz for macOS. You can get this via https://www.xquartz.org/. The second step was to run the command socat TCP-LISTEN:6000,reuseaddr,fork UNIX-CLIENT:\"$DISPLAY\" in a separate terminal. Once you have this running in a terminal, you need to set the DISPLAY variable to following in Kitematic: ipaddress:0 (replacing ipaddress with you address). At this point the docker image should start for you, and this is where the layers of crazy start coming out.
You will notice that once you fix the DISPLAY variable issue, you now run into openGL issues. You need to edit the file /opt/X11/bin/startx and look for the options defaultserverargs. Add +iglx to those options using you favorite editor and save. Log out and back in to restart xquartz and give it another try.
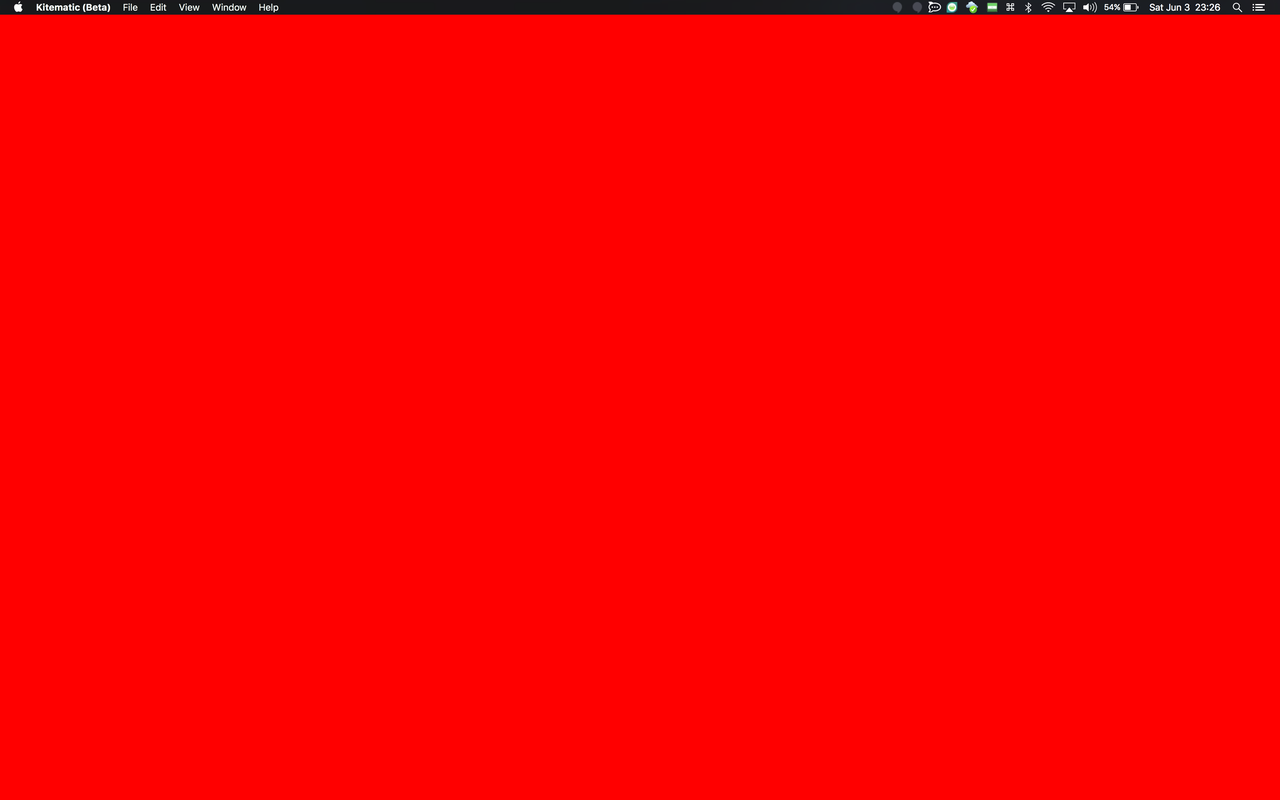
At this point, you start seeing some real craziness, red screens and all.
This is where I got stuck. Apparently xqaurtz is stuck to openGL 2.1 where KDE and more modern X11 programs expect you to be able to produce openGL 3+.
At this point, I wouldn't say I have given up, but defiitely was a fun experiement and provided great insight. We shall see where this leads me.